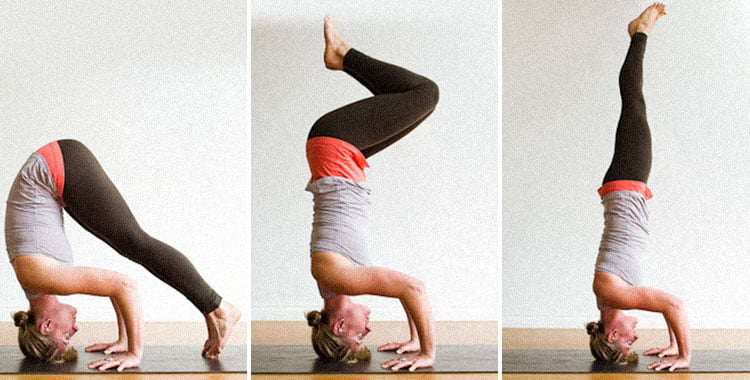
How to do Headstand, Sirsasana II
Yoga classes in Milton Keynes & Bletchley with YogaLily.
Sirsasana II – Headstand has been called the King of asana, and its benefits are indeed innumerable: calming the nervous system, nourishing to the brain cells, stimulating to the heart and circulation, balancing to the hormonal and digestive systems, strengthening to the spirit, and giving the floor a much deserved break from our feet. Flip your world upside-down for a fresh perspective on headstand with five steps to master the pose.
Important: Those with high/low blood pressure or acute neck pain, women on their moon/menstrual cycle and women who are pregnant should not attempt Sirsasana II.
Warm up
You don’t want to just dive right into this one. It’s important to warm up the pivotal muscles in the body that are used in this posture. Try the following to prepare the body:
- Downward Facing Dog
- Hare Pose
- Elbow Balance
- Shoulder Openers
- Core Work
- Hamstring Stretches
The five steps to headstand
1. Use a sticky mat (doubled over, if you want extra cushion). On your hands and knees, bring the crown of your head to the ground. With your palms flat and near your head, bring your hands away from your face – this creates the ‘tripod’ between the head and hands. Your forearms should now be perpendicular to the ground. Lift your knees up and walk your feet in. Stay here for 5-20 breaths.
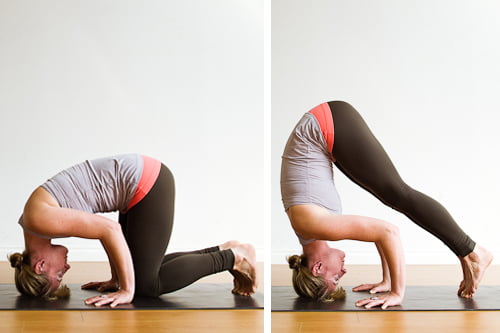
2. When your feet are in as close as possible (essentially your bum is aligned on top of the head and the shoulders), try bringing each knee, one at a time, to rest on top of your triceps (teddy bear headstand). Stay here for 5-20 breaths.
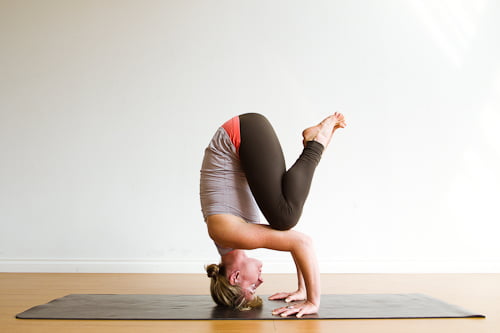
3. In teddy bear headstand, engage your abdominals and float the knees off your triceps, bring your knees to touch and keep your legs bent, with your heels near your bum. Stay here for 5-20 breaths.

4. With your knees and big toes touching, roll your bent legs slowly upwards, until your knees are pointing up to the ceiling. Going through all theses motions slowly requires engaging core strength. Stay 5-20 breaths.
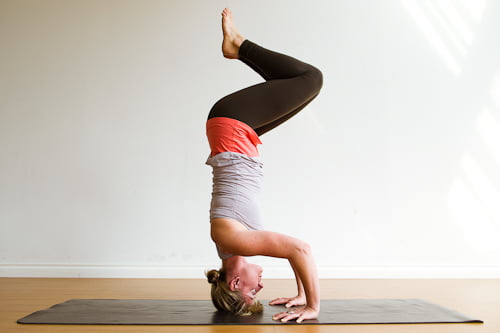
5. Finally, extend your legs straight up into the air. Seal the inner legs together. Hold for as long as you desire, then come down slowly, the exact same way you rolled up!
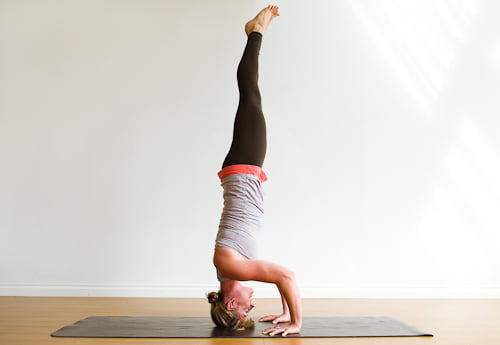
These five steps break down the posture so that you can push yourself only as far as you feel comfortable. If you only get to step one the first time, that’s okay!
TIPS
Gaze: Tip of nose
Counter poses:
- Child Pose (practice for a few moments after coming down)
- Shoulder Stand
- Neck Releases
Effect: Balancing
Headstand, Sirsasana II Counter Poses
In yoga we use a counter pose in a sequence; For example, a twist follows a backbend to “neutralise” the spine, or a forward bend follows a backbend to help lengthen the spine and calm the nervous system.

Child Pose, Balasana

Shoulderstand

Neck Releases

